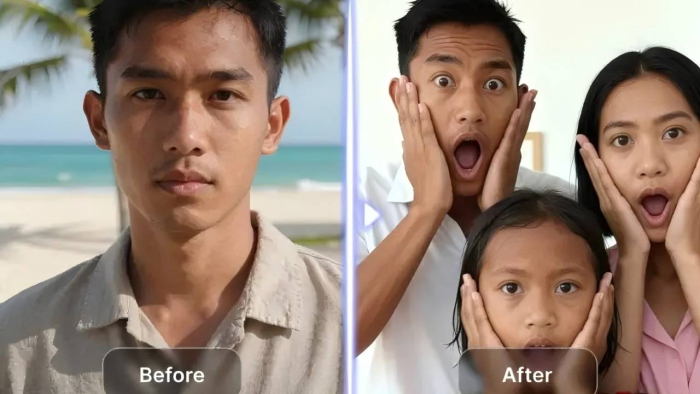
Sometimes, a shot has the right composition and subject but looks too dark, lacks contrast, or contains a distracting detail. Fixing these details manually may seem frustrating for beginners who prioritize easy photo editing. On the other hand, professionals with strict deadlines and large volumes of files may not have time to enhance every picture individually. That is where artificial intelligence (AI) enters the game.
Luminar is a high-quality AI-based photo editor that can analyze an image and suggest or apply adjustments based on what they detect in the frame. It means the user does not have to move every slider mindlessly to understand the issue and how to fix it. This task is delegated to the cyber brain.
In this article, we will see how to enhance photos using artificial intelligence. We will provide practical, relevant photo-editing examples using Luminar to help you handle routine corrections while leaving decisions about mood, composition, and style in your hands.
Step 1: Baseline
Imagine a typical starting stage of any photo editing process. You look at the picture, understand that something is off, but you don't see what it is. Some algorithms might help you with it, so you ask yourself: how can I edit photos using AI?
The most common issues typically include lighting and color. For example, a landscape captured on an overcast day may have good detail but appear dull on screen. Luminar has an Enhance AI tool to establish a reliable starting point for brightness, contrast, exposure, saturation, and more.
Step 2: Light and Structure
As we said, lighting issues are fundamental to learning how to enhance a photo. However, tweaking the overall picture's brightness or contrast is insufficient. Photographers often need more advanced techniques to ensure the image is evenly lit and that no important details are washed out or obscured.
Luminar's Light Depth tool is designed specifically for complex illumination inconsistencies. It analyzes the image and creates a depth-based understanding of the scene, allowing you to adjust brightness in different areas. This approach is especially helpful for backlit portraits, landscapes with uneven illumination, or outdoor shots where the foreground and sky need different treatment.
Some of the best photo editing techniques focus on guiding the viewer's eye and emphasizing the most important elements. Can AI be helpful here? Absolutely. Luminar's Structure AI feature enhances details and contrast without oversharpening the entire picture or introducing unappealing grain. Try a moderate adjustment first, then fine-tune it until the details look noticeable but realistic.
Step 3: Portrait Subject Definition
We usually use photo-editing tips to emphasize the most important elements when we need to define the subject and ensure the viewer is not distracted by anything else. It is especially important for portraits. Basic sharpening is usually not enough for human faces; that is why Luminar has a bunch of portrait-specific tools.
Face AI can refine facial details, while Skin AI is designed to reduce visible skin imperfections while keeping the result natural. You can also use Portrait Bokeh AI to create a softer background around the subject, making the person stand out more clearly.
When you use AI to edit photos, the final result should be authentic and preserve emotions. Every human face is a story to tell; do not compromise this story for a unified, plastic-like appearance, no matter how flawless it may look. Zoom in to check details, compare the edited version with the original, and reduce the adjustment if the subject looks artificial.
Step 4: Generative Tools
When you ask yourself, "How do I quickly edit photos with AI?" you often understand that removing basic drawbacks is not enough to make the image look appealing. Sometimes you need to remove or replace specific elements within the frame, and sometimes looking beyond it can help you convey your creative ideas more effectively.
Luminar includes GenErase, GenSwap, and GenExpand for these kinds of tasks. GenErase removes selected elements and fills the area, while GenSwap replaces an element with a new one. GenExpand extends the image beyond its original borders, which can be useful when you need more space around a subject or a different composition.
You might want to delete a disturbing sign from a road image, for instance, or pull out the edges of a panorama when your border feels too cramped. These generative modifications should be local and relevant. Try taking a look at the details around where you are cropping, and ensure the result looks suitable alongside everything else in the picture.
Conclusion
Although AI tools such as Luminar are great for technical corrections, the core of any outstanding photo remains your unique, human approach. These smart assistants give back time instead of diminishing human input – leaving you time to focus on experimentations and capture the story only you can tell.
Post Comment
Share your thoughts about this article.
Be the first to post a comment!