Related Articles


Best No-Code Database Builders With AI Features
AI Tool
Nov 10, 2026
A polished video often begins with something simple: a script. The script may describe a product, explain a process, introduce an idea, or tell a short customer story. Turning that script into a finished video, however, usually requires several separate tasks, including scene planning, visual selection, voiceover recording, caption creation, music editing, and timeline adjustments.
An AI-assisted workflow can connect these steps. Instead of starting with a blank timeline, creators can use a written script to build an initial sequence of editable scenes. This approach is useful for social media creators, marketers, educators, small businesses, and anyone who needs to turn written ideas into videos efficiently.
The important point is that an AI-generated video should be treated as an editable draft. It provides structure and suggestions, while the creator remains responsible for accuracy, tone, visual choices, and final quality. The following workflow explains how to move from a script to a flexible video project.
The quality of the generated video depends heavily on the quality of the script. A vague paragraph may produce a vague sequence, while a structured script gives the system clearer instructions about scenes, timing, and emphasis.
A practical short-form script can include five parts:
The opening should tell viewers why the video deserves their attention. It could identify a common problem, ask a specific question, or promise a useful result. The middle of the script should develop one main idea instead of combining several unrelated topics.
Write in short, natural sentences. This makes the script easier to narrate and easier to display as captions. It also helps divide the video into scenes. If one sentence contains several ideas, consider splitting it into separate lines.
Before importing the script, remove unnecessary formatting and clarify any terms that could be misunderstood. Identify product names, technical phrases, numbers, and brand terms that require accurate pronunciation or spelling.
It is also useful to mark visual instructions in the script. For example:
These notes give the creator a way to communicate the intended visual direction. They also make it easier to replace generic suggestions after the first draft is generated.
A script should also indicate the intended audience and tone. A product tutorial may need a calm, instructional style, while a social announcement may require a faster pace. Include the preferred video length and format if those details are already known.
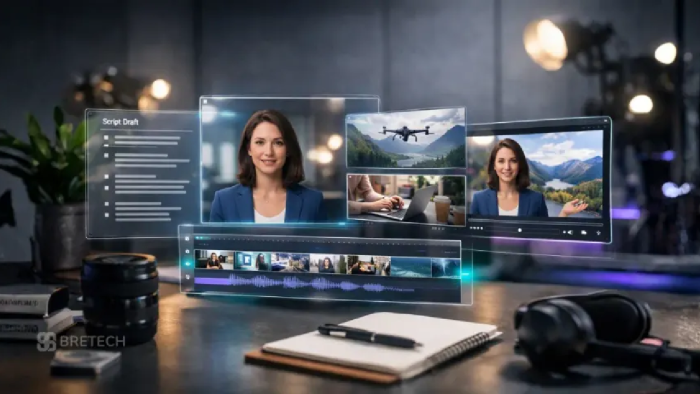
Once the script is ready, an AI video workflow can help create an initial sequence. Tools such as CapCut's AI video generator can support the transition from written content to a visual draft by organizing the script into scenes, adding suggested visuals, and creating a basic timeline.
The first draft may include:
Do not judge the draft only by how attractive it looks. Review whether the sequence communicates the original message. A visually impressive scene that does not support the script should be replaced. The purpose of the first generation is to provide a workable foundation for editing.
After the draft is created, compare each sentence with its corresponding scene. The visual should help explain, demonstrate, or reinforce the spoken message.
For example, a sentence about simplifying a work process may be supported by a screen recording, a checklist, or a sequence showing fewer steps. A sentence about a physical product should ideally show the product itself rather than unrelated lifestyle footage.
Ask the following questions:
If the answer to several questions is no, revise the scene before moving on. It is usually more efficient to correct the structure early than to polish a weak sequence later.
AI-generated drafts often use general-purpose imagery to represent broad concepts. This can be useful for brainstorming, but branded content usually needs more specific assets.
Replace generic scenes with:
When replacing a scene, keep the timing of the narration in mind. A detailed product screen may need more time than a simple background image. Adjust the duration so viewers can understand what they are seeing.
Visual consistency also matters. If one scene uses a bright, modern style and the next uses a dark, documentary look, the video may feel disconnected. Choose assets with a similar color balance, lighting style, and level of detail.
The timeline is where a generated draft becomes a real video project. Review the order of scenes and decide whether the viewer receives information in the most useful sequence.
Sometimes the strongest structure is chronological: problem, process, result. In other cases, a result-first structure works better: show the outcome, explain how it was achieved, then invite the viewer to learn more.
Use the timeline to:
Avoid adding movement simply to make the video feel busy. Every cut should support understanding, emotion, or momentum. A slower scene can be effective when the viewer needs time to inspect a product or read a key point.
Captions are essential for social videos because many viewers watch without sound. Automatic captions can save time, but they still require review.
Correct:
Keep captions short enough to read comfortably on a mobile screen. Break long sentences into natural phrases instead of displaying large blocks of text. Make sure captions do not cover important buttons, faces, product labels, or other visual information.
Caption styling should support the brand and the subject. Use contrast, readable font sizes, and consistent positioning. Highlighting one or two key words can help guide attention, but excessive animation can make the video difficult to follow.
A generated voiceover can help turn a script into a complete draft, especially when the creator does not plan to appear on camera. Listen to the full narration before finalizing the edit.
Check whether the voice:
If a sentence sounds unnatural, rewrite it instead of relying only on speed adjustments. Spoken language often needs shorter phrasing than written language.
Music should support the voiceover and the subject. Keep the music quiet enough that every word remains understandable. A change in music can also help signal a transition, but frequent changes may distract viewers.
A consistent brand system helps viewers recognize content across different channels. Add approved colors, fonts, logos, and closing screens where appropriate.
Brand elements should remain useful rather than decorative. A logo may work well at the beginning or end, while a subtle color treatment can appear throughout the video. Avoid placing oversized graphics over the product or message.
If the project belongs to a campaign, save the final style as a reusable template. This can help the team create future videos more quickly while preserving the same visual identity.
A single script may need several video formats. Social platforms commonly use vertical video, while websites, presentations, and video channels may require horizontal layouts. Some campaigns also need square versions.
When changing aspect ratios, review the framing manually. A subject that looks centered in a horizontal video may be cut off in a vertical version. Captions may also need to move to a different position.
Consider creating slightly different openings for each platform. A professional audience may respond to a direct benefit, while a casual social audience may prefer a question or surprising statement. Keep the central information consistent while adapting the presentation.
An editable draft still requires human review. Check every claim, number, product description, and customer reference. AI tools may generate wording that sounds confident but is not supported by the source material.
Confirm that you have permission to use uploaded footage, customer images, music, stock media, and quoted statements. If the video promotes a product or service, review the platform's commercial usage and export rules.
Watch the final video once with sound and once without sound. The first review checks narration, music, and timing. The second review shows whether the visual sequence and captions communicate the message independently.
The greatest benefit of AI video generation appears when the process can be repeated. Save a standard brief that includes the audience, objective, tone, duration, format, key message, required assets, and call to action.
Keep a review checklist for:
Track the edits your team makes most often. If generic scenes are repeatedly replaced with product demonstrations, add that direction to future briefs. If openings are consistently shortened, write tighter hooks before generation.
Moving from script to editable scenes is most effective when AI handles the repetitive starting work and the creator controls the decisions that shape the final result. With a clear script, relevant assets, careful timeline editing, and a thorough review, an AI-generated draft can become a polished video that is easier to understand, easier to revise, and ready for the channel where it will be published.
Share your thoughts about this article.
Be the first to post a comment!