Have you lost an important file on Windows 11 and wondered if there’s still a way to get it? Unfortunately, data loss is more common than you might think. People rely more and more on their devices and often store important information on their computers, which makes the impact of file loss even greater. Windows 11 includes several built-in ways to restore files, and when those options don’t provide the results you need, dedicated recovery tools and professional services can step in. This article aims to give you clear instruction on how to get your files back and explains what actually works for file recovery on Windows 11 in 2025.
Built-in Windows 11 Recovery Options
Windows 11 comes with several built-in recovery features that can allow you to restore recently deleted files without any software. These options are quick, safe to use, and often solve the problem without extra downloads. Here is how to recover deleted files on Windows 11 with simple solutions like the Recycle Bin and File History, and if these aren’t enough, we’ll move on to more advanced fixes.
1. Undo Delete
The quickest way to recover a file you just removed is to undo the action:
- Open the folder where the file was stored.
- Press CTRL + Z on your keyboard.
- Alternatively, right-click inside the folder and select Undo Delete.
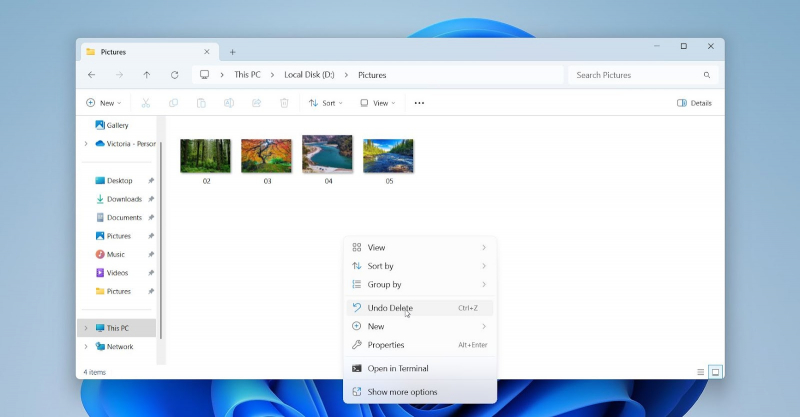
⚠️ This option works only for the most recent deletion. It does not survive a system restart.
2. Check the Recycle Bin
Most deleted files in Windows 11 first go to the Recycle Bin. This acts as a temporary holding area before permanent deletion. Unless you used Shift + Delete or removed files from an external drive, your files should remain in the Recycle Bin until you empty it. The size limit of the Recycle Bin can also cause large files to bypass it entirely.
- Double-click the Recycle Bin icon on your desktop.
- Browse through the deleted items list.
- Highlight the files or folders you want to restore.
- Right-click and choose Restore, or drag them back into any folder.
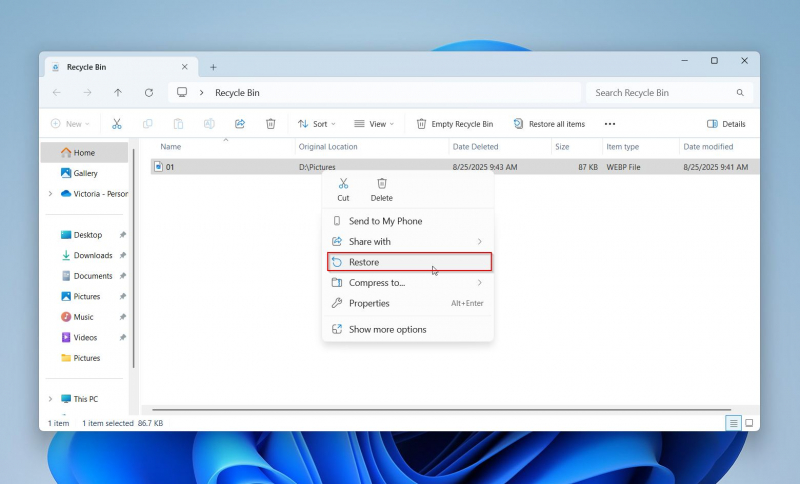
Files that exceed the Recycle Bin’s size limit, or files deleted from USB flash drives and SD cards, do not appear here. Once the bin is emptied, recovery requires another method.
3. Use File History
File History is one of the most valuable recovery features in Windows 11. It creates regular backups of files in common locations such as Documents, Pictures, Videos, Music, and Desktop. If configured, it allows you to roll back to previous versions of files or recover items deleted weeks or months ago.
1. Open the Start Menu, type Control Panel, and open it.
2. Go to System and Security. Then click File History.

3. Select Restore personal files from the left-hand menu.
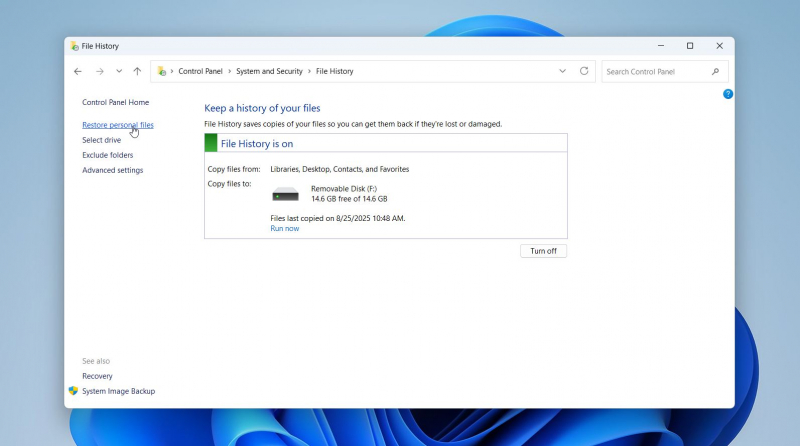
4. Use the arrows at the bottom to browse through versions.
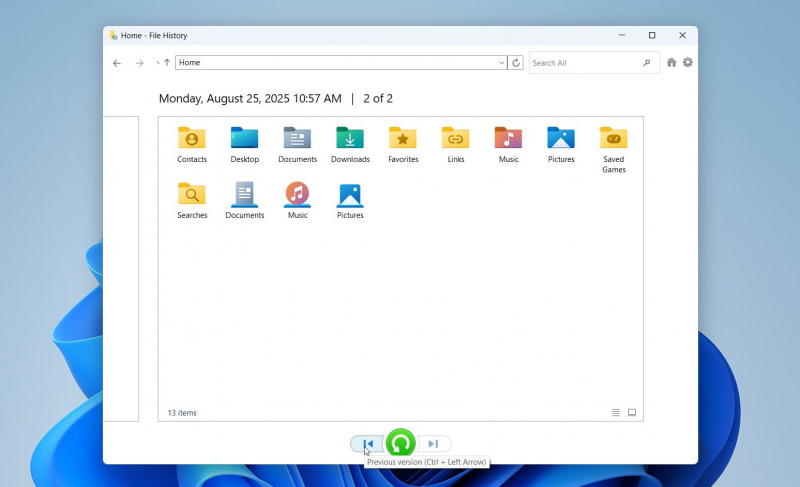
5. Select the file(s) and press the green Recover button.
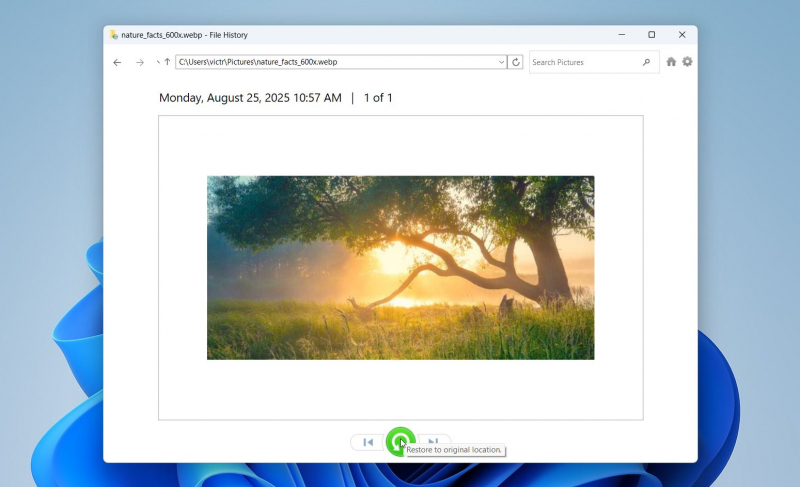
File History only works if it was enabled before the deletion. If you never set it up, Windows cannot retroactively recover files this way.
These built-in methods are the first steps you should try when you lose files on Windows 11. In many cases, Undo Delete, Recycle Bin, or File History will save you. For more complex cases, 7 Data Recovery Experts can provide guidance when built-in options are no longer enough.
Best Windows 11 File Recovery Software in 2025
Even though Windows 11 comes with a few built-in recovery options, in many cases, they simply won’t cut it. You might be able to get some files back if they’re still sitting in the Recycle Bin or if you had backups running, but for most people, that’s usually not the case. In those situations, you’ll need a dedicated Windows 11 file recovery tool to improve your chances and scan for data that Windows can’t restore on its own.
A lot of people nowadays are cautious about downloading new software or have doubts about how useful or safe it is. If you Google “data recovery tools”, you will see dozens of search results, which can make it difficult for you to choose one. That’s why we created a short list of the best file recovery tools. Below, you can find some of the most trusted and rigorously tested options to recover deleted files:
1. Disk Drill
Disk Drill is perhaps one of the most popular tools on the market, with a strong reputation and data recovery capabilities. It supports numerous file systems, including NTFS, FAT32, exFAT, and ReFS, and can work with the majority of file types, which makes it an all-around option. The software lets you scan your device for free, view all the files it detects, and even preview them to make sure they can be recovered before deciding to upgrade.
Here is how to recover files using Disk Drill:
1. Download and install Disk Drill for Windows from the official CleverFiles website.
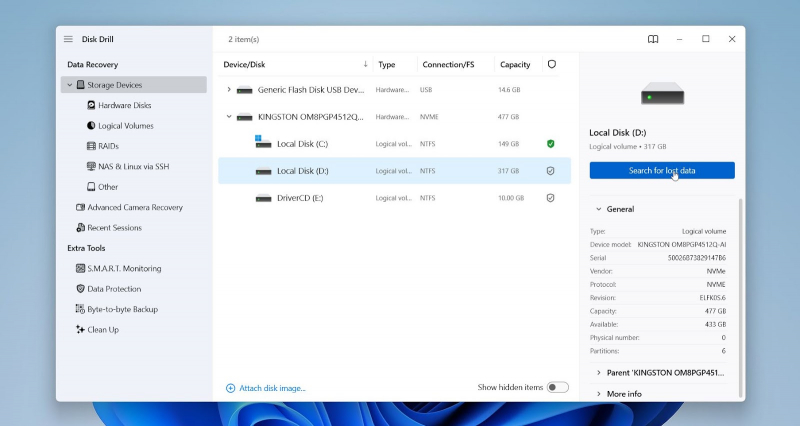
2. Launch the program and allow it to detect connected drives. Select the drive where your lost files were stored.
3. Click Search for lost data to begin the scan.
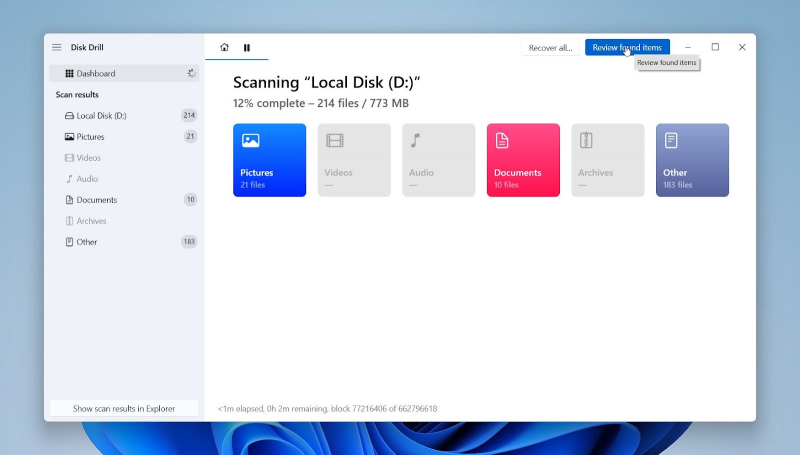
4. Wait while Disk Drill analyzes the drive. You can press Review found items at any time to see results before the scan completes.
5. Use filters such as file type or file size to narrow results. Preview files by clicking on them to confirm they are intact.
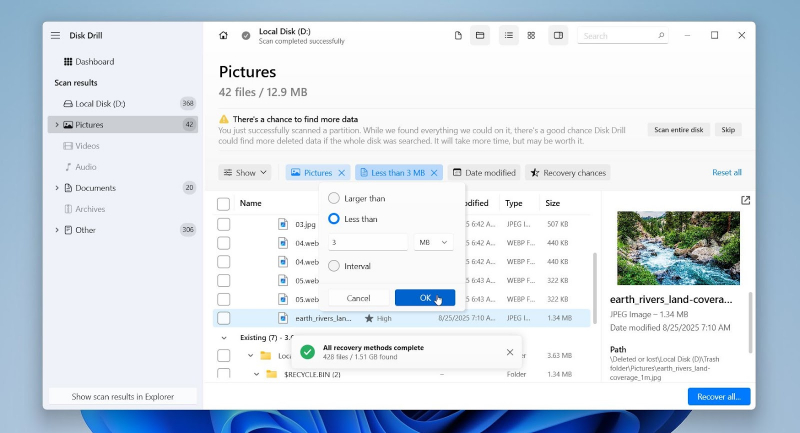
6. Check the boxes next to the files you want to recover. Press Recover.
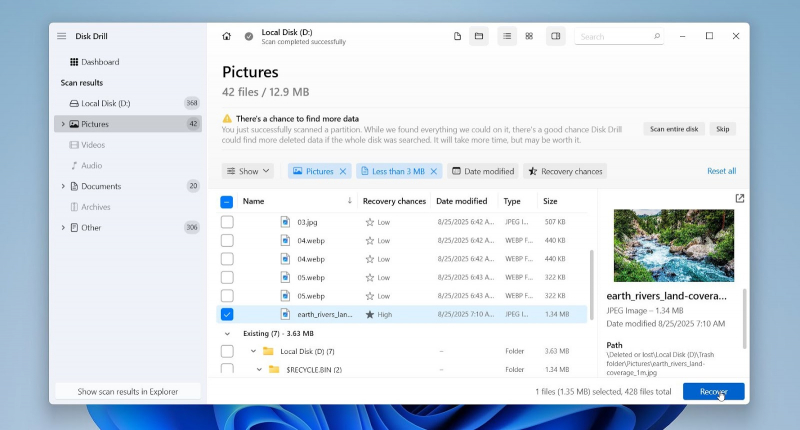
7. Then choose a different drive or external device as the recovery destination.
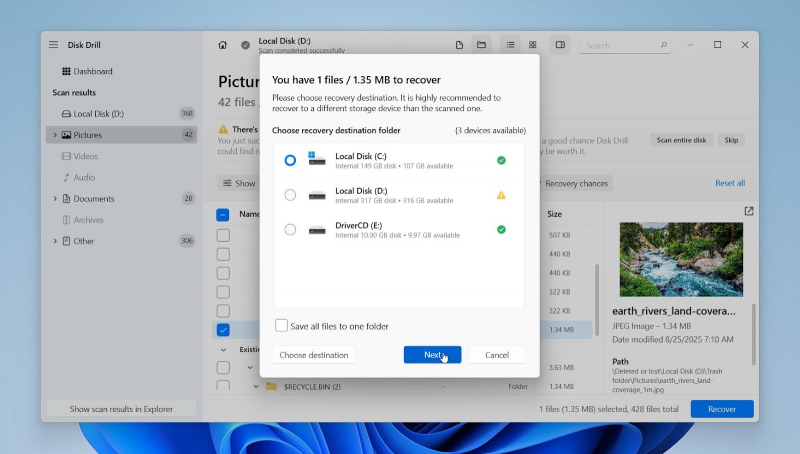
With its balance of simplicity and strong technical range, Disk Drill stands out as a tool that works well for everyday users. Its ability to preview results during a scan makes it particularly convenient compared to many alternatives.
2. R-Studio
R-Studio is professional-grade software for skilled users who need more than a simple “scan and restore” program. It offers deep system-level recovery capabilities that handle complex cases, such as corrupted partitions, damaged file systems, and RAID arrays. It can be useful, but if you need to recover just a couple of files, there are some more suitable options in the list. R-Studio does not offer a truly free edition like Disk Drill. Instead, it provides a trial version that allows you to scan drives, preview recoverable files, and evaluate the software, but you can only recover files up to 256 KB in size.
Here is how to recover files using R-Studio:
1. Download and install R-Studio from the official R-TT website.
2. Launch the application and let it detect all connected drives and partitions.
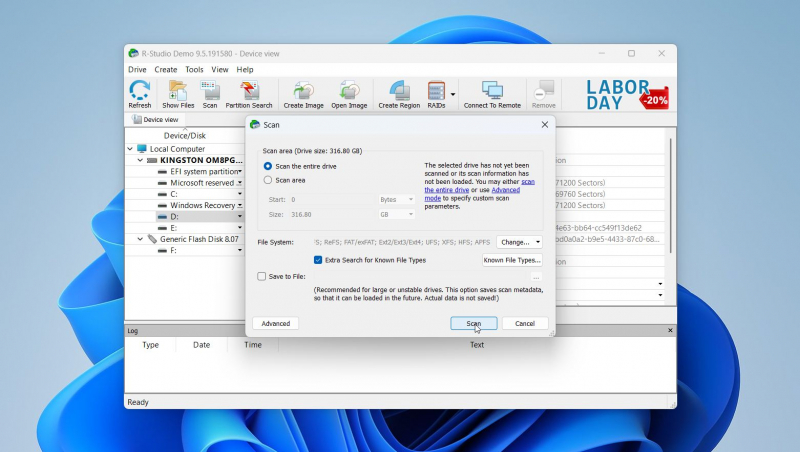
3. Select the storage device containing the lost files. Click Scan, then choose the type of scan (Quick, Detailed, or specific file system).
4. When the scan completes, browse the tree view of folders to locate your files. Preview files (supported formats only) to verify integrity.
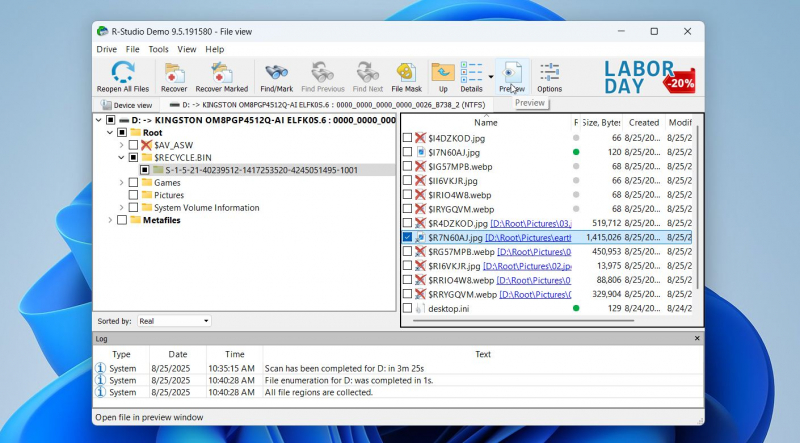
5. Select the files you want to restore and click Recover. Specify a destination path on another drive.
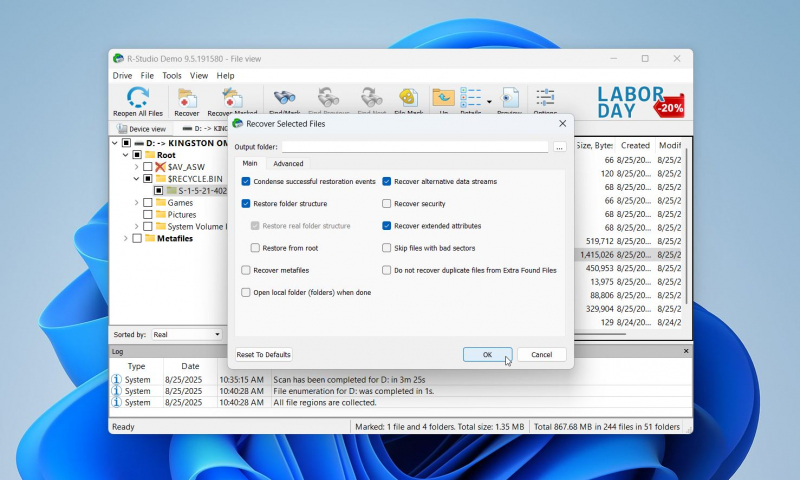
The real strength of R-Studio lies in its flexibility and professional-grade control. For cases involving RAID setups or non-standard file systems, it offers functions that few other consumer tools provide, which is why it’s often the preferred choice in specialized recovery environments.
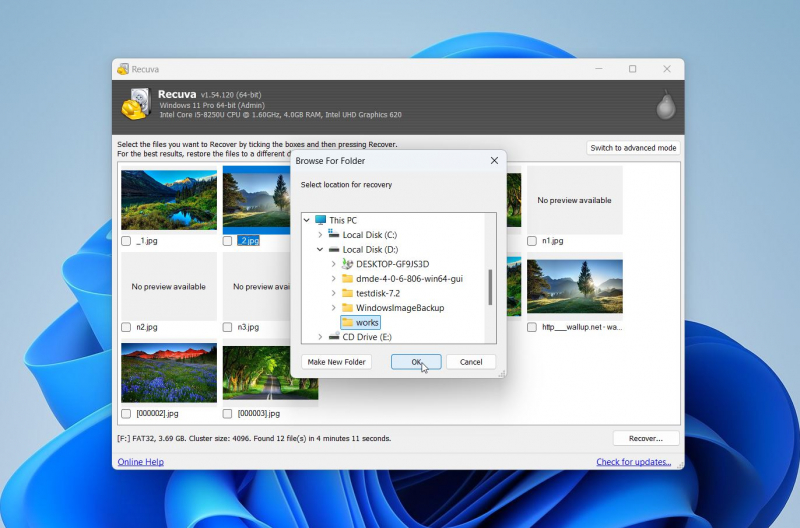
3. Recuva
Recuva might be a bit outdated, but many users still use it to recover deleted data to this day. It’s great for small recoveries: lightweight, a simple wizard, preview features, and a free version. Recuva is a great free option. but keep in mind that it might not work with less common or new filetypes, like the ones used in modern cameras.
Here is how to use Recuva:
1. Download and install Recuva from the official Piriform website.
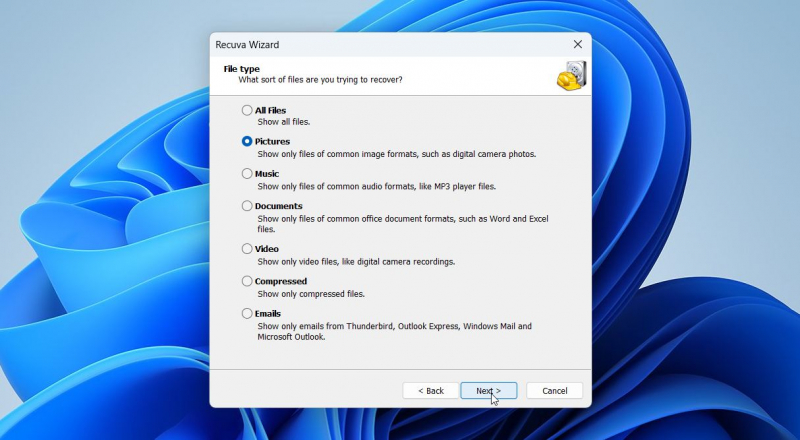
2. Launch the program, and the recovery wizard will appear. Select the file type you want to recover (e.g., documents, pictures, videos).
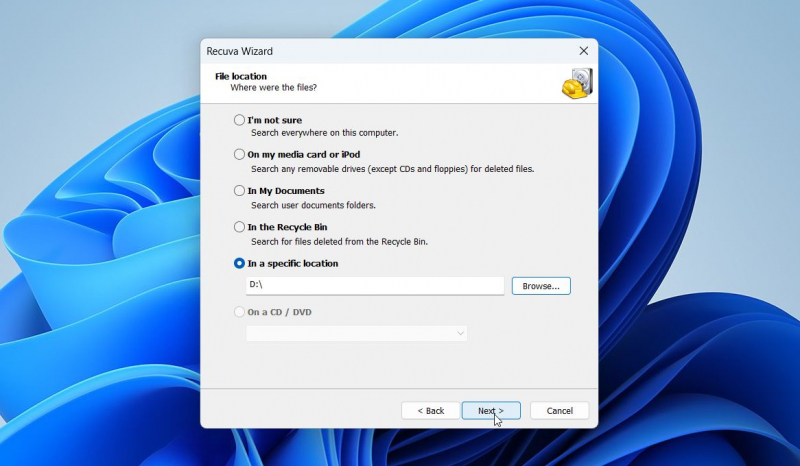
3. Choose the file location (Recycle Bin, a specific folder, or the entire drive).
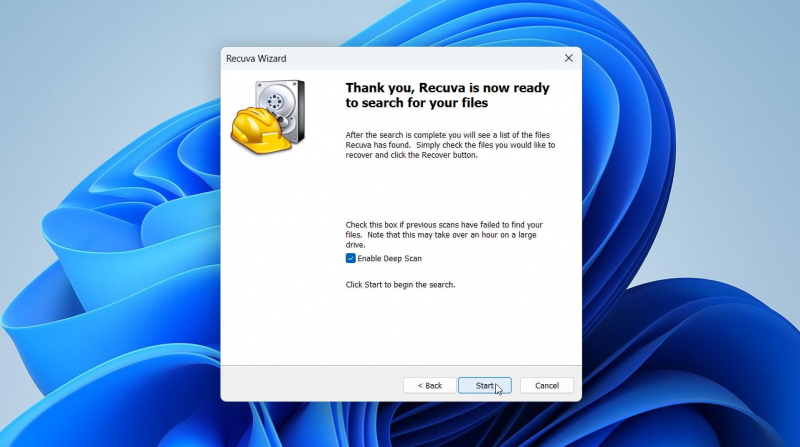
4. Click Start to begin scanning. For a deeper search, enable Deep Scan (slower but more thorough).
5. Once the scan finishes, review the list of files. Preview files in the preview pane (if supported). Select and recover.
If none of these solutions fully meet your needs, there are other capable options worth considering. Tools like DiskGenius (a mix of recovery and partition management), PhotoRec (an open-source choice with wide format support), and DMDE (well-regarded for handling complex recovery cases) may serve as alternatives. While they don’t always offer the same balance of usability and features as the main tools listed above, they remain valuable options to try when the first picks don’t deliver the results you’re looking for.
Key Rules for Higher Data Recovery Chances
When files go missing on Windows 11, the first instinct is usually to download a recovery program and start scanning. However, recovery doesn’t depend only on the tool you use, it also depends on the steps you take before and during the process. These rules apply universally, regardless of the cause of data loss, and they often determine whether you restore intact files or lose them forever. Here is everything you should know about data recovery on Windows 11:
- ⚡ You should act quickly. Time is very often the most important factor in recovery. The longer you wait, the higher the chance that Windows 11 or another application writes new data over the deleted files. As soon as you notice something missing, stop unnecessary activity on your PC and begin recovery immediately.
- 💽 Avoid writing to the affected drive. Every action that saves new information to the same disk, even if it's just browsing the web, can overwrite files you’re trying to restore. That’s exactly why it’s not recommended to install data recovery software on the affected drive.
- 🖼️ Create a disk image first. Professionals recommend cloning the entire disk before data recovery. A disk image preserves the current state of the drive and allows you to scan the copy instead of the original hardware. This is especially important if the drive is unstable, has bad sectors, or shows early signs of failure.
- 🔎 Check multiple sources. Your missing file may not be gone at all. Look for it in synced cloud services such as OneDrive, Google Drive, or Dropbox, as well as on external drives or even in email attachments. Verify all possible sources, as it can often save time and help to avoid deeper recovery steps.
- 🛠️ Combine methods. No single method covers every case. Start with Windows 11’s built-in features (Recycle Bin, File History, OneDrive), then move on to dedicated software if needed. For severe corruption or hardware damage, don’t risk permanent loss, consult professional recovery services to increase your chances of success.
These rules form the foundation for successful recovery. They don’t replace specific tools or methods but strengthen them, making each attempt safer and more likely to succeed. Once you have applied these practices, you can move forward with advanced utilities.
Final Thoughts
File recovery on Windows 11 in 2025 is no longer a guessing game. Between built-in recovery tools and specialized software, you have reliable ways to get back data in most situations. The key is to follow safe recovery practices and choose the method that matches your scenario. Start simple with Undo Delete or Recycle Bin, then move to tools like Disk Drill, R-Studio, or Recuva for more complex cases. And when software isn’t enough, don’t hesitate to contact professional experts who can handle severe hardware or corruption issues.
FAQ
How long does file recovery take?
Recovery time depends on drive size, scan type, storage condition, and overall system performance. Quick scans on small drives may finish in minutes, whereas deep scans on large or damaged disks can take hours. Tools such as Disk Drill provide file previews during a scan, which can save time when you need only a few items. The process also varies with hardware speed: SSDs usually finish scans faster than HDDs. If recovery uses external media, USB transfer rates can extend the total time.
Can I recover files from a formatted drive?
Yes, recovery is possible after a quick format, since this process only clears the file system structure without fully overwriting the data blocks. Tools such as Disk Drill can scan the drive and restore files in many cases. A full format, however, wipes the storage more thoroughly and makes recovery impossible even with advanced software.
Are files deleted with Shift + Delete gone forever?
Files removed with Shift + Delete bypass the Recycle Bin, but they are not immediately erased. Until new data overwrites their storage blocks, recovery software can still retrieve them. On SSDs, the TRIM function can make recovery more difficult, so results vary depending on the drive type. For HDDs, the likelihood of recovery is usually much higher as long as the drive has not been heavily used after deletion.
Post Comment
Be the first to post comment!


